This tutorial will take you through installing XAMPP (Apache Server, MySQL, PHP, and Perl; the X is to indicate it is cross-platform) as a portable application on a USB drive. To complete this tutorial you should have a USB2.0 drive with at least 500 mb of free space available (I recommend a minimum of a 2Gb drive dedicated to this purpose).
We will be installing XAMPPLite as it is a bit smaller (approximately a quarter of the size at 277mb) of the current full install of XAMPP and therefore better suited to run off a stick. There is no XAMPPLite at the current version release of XAMPP, so we will download and install the last release (1.7.3).
Download the file from:
Once downloaded (the file is only 28.4mb) run the file.

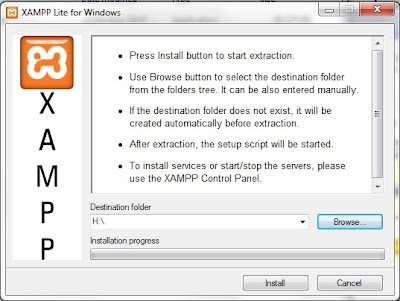
This window will appear. Ensure that your USB drive is plugged into a USB port on your computer. Select the letter assigned to your drive for the Destination folder shown to the left. Click on the Install button and go put your feet up for a bit (it will unpack the files to your drive which should take approximately 20-30 minutes).
Once the unpacking is finished a command prompt window will open and ask a series of questions:
- Should I add shortcuts to the startmenu/desktop? (y/n)
Choose n (no) here as this is a portable install and you probably won't run it off this computer on a regular basis (otherwise do a normal install of XAMPP or a similar program).
- Should I locate the XAMPP paths correctly? Should I proceed? (y/x=exit setup):
Choose y (yes) here as this is not really much of a choice (and is necessary for any install of XAMPP).
- Should I make XAMPP portable without drive letters? Your choice (y/n):
Choose y (yes) here as USB drives can be assigned a different drive letter depending on what is already installed on the host computer. This will allow XAMPP to work regardless of the drive letter on the USB Drive. However, you will have to manually start XAMPP to work with it off the stick (as it will not be a service). This will be covered in the next tutorial.
You should now receive a number of lines indicating that programs are being relocated followed by a message saying that XAMPP is ready to use. Press the enter key to move to the next step.
XAMPP then indicates that it set the time zone for you and where to go to change that later (once again a future tutorial).
At this point you are presented with a menu of options. Choose x to exit the menu. Congratulations you are now the proud owner of a portable web server.
